• Select your computer name, in my case ”WIN10PRO”
2.1 Create Server Master virtual machine
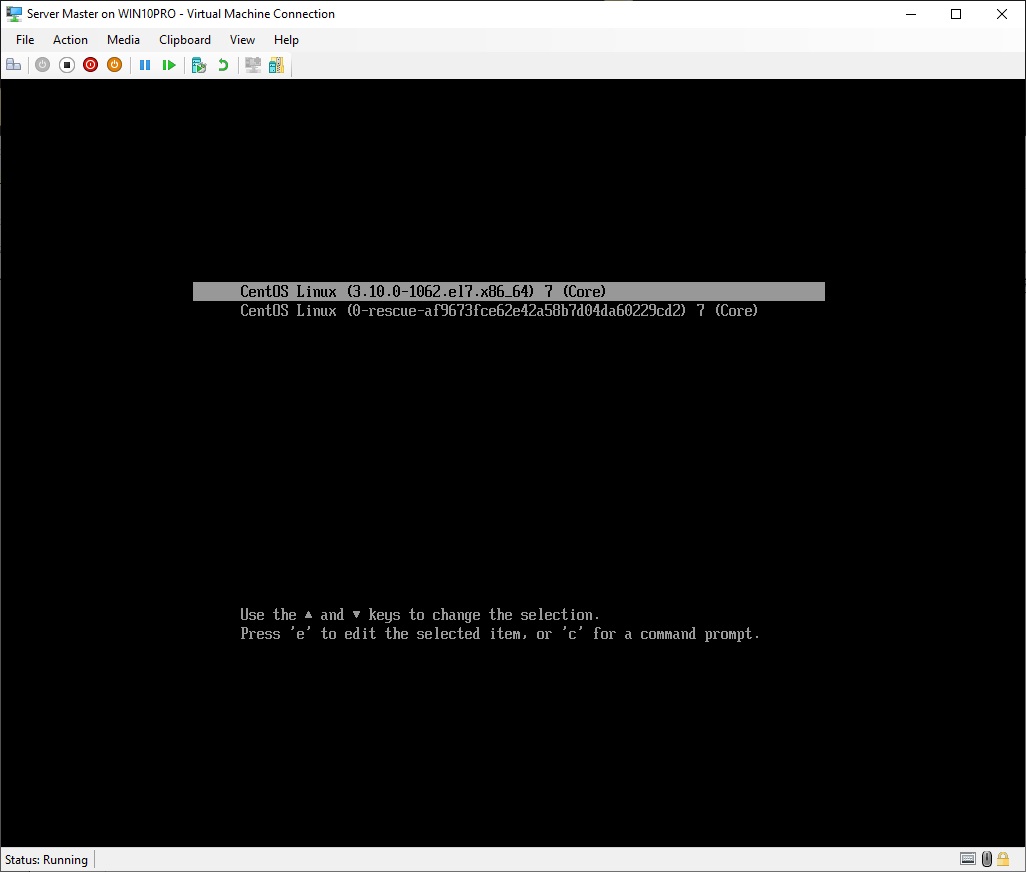
2.3 Startup Server Master virtual machine
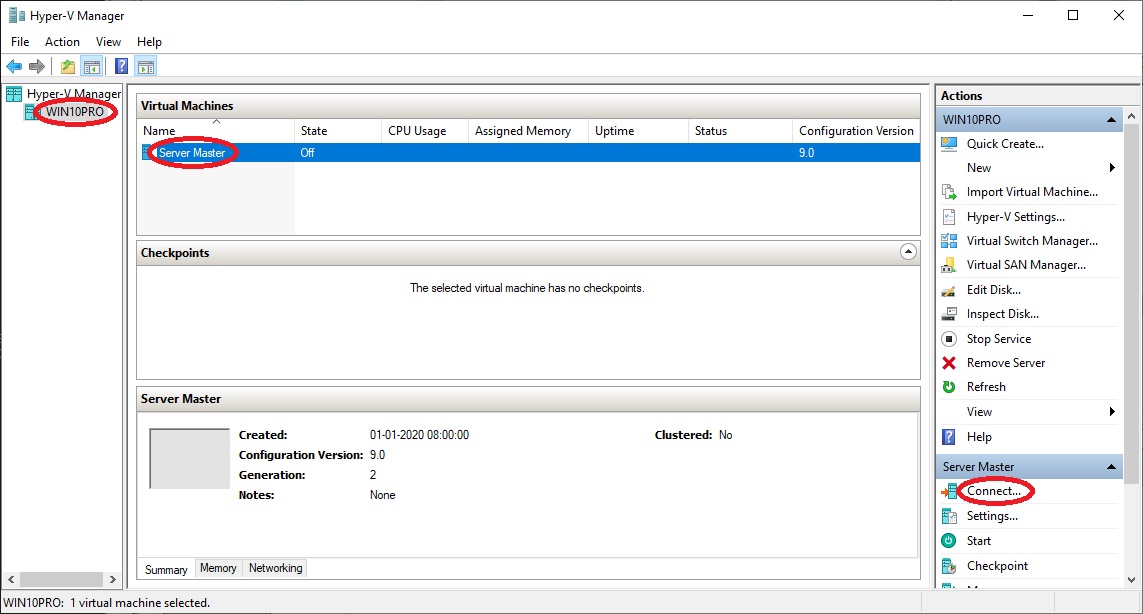
• Open ”Hyper-V Manager” from the start-menu
•
Select your computer name, in my case ”WIN10PRO”
• At "Virtual Machines" select "Server Master"
• At "Actions" click "Connect..."
•
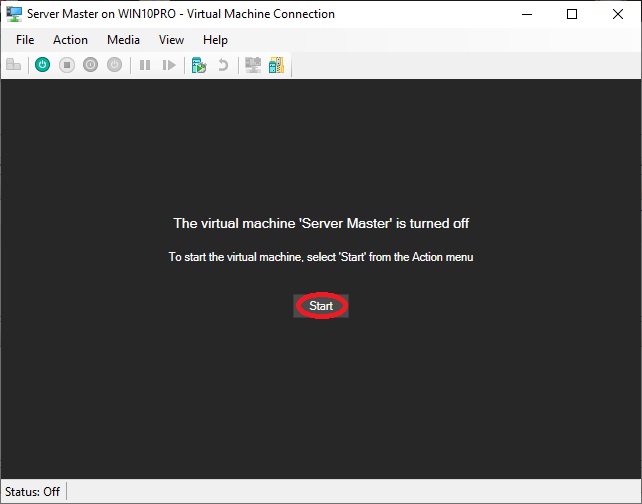
Click "Start"
•
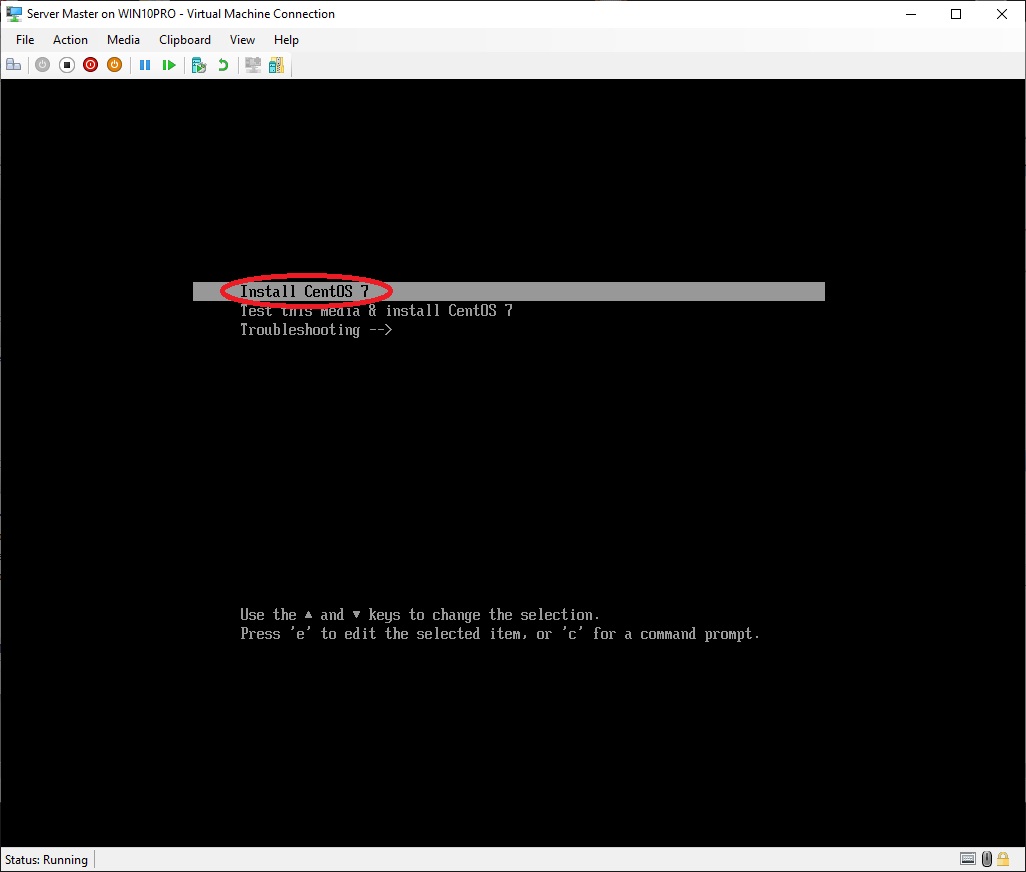
Select "Install CentOS 7"
using the arrow-keys
• Press "Enter"
•
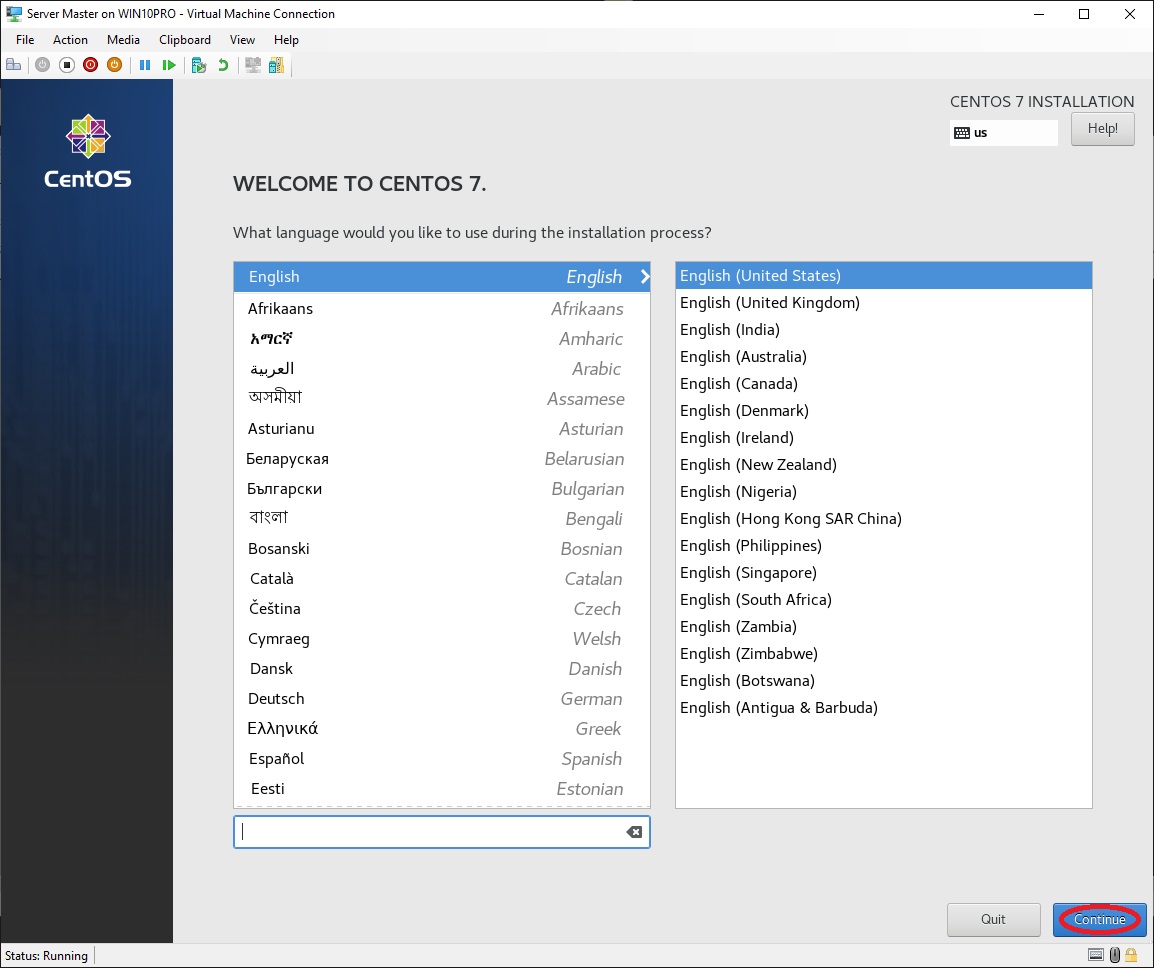
Choose your preferred system language, I prefer that the installation
and system language is english, so I leave it at "English
(United States)", click "Continue"
•
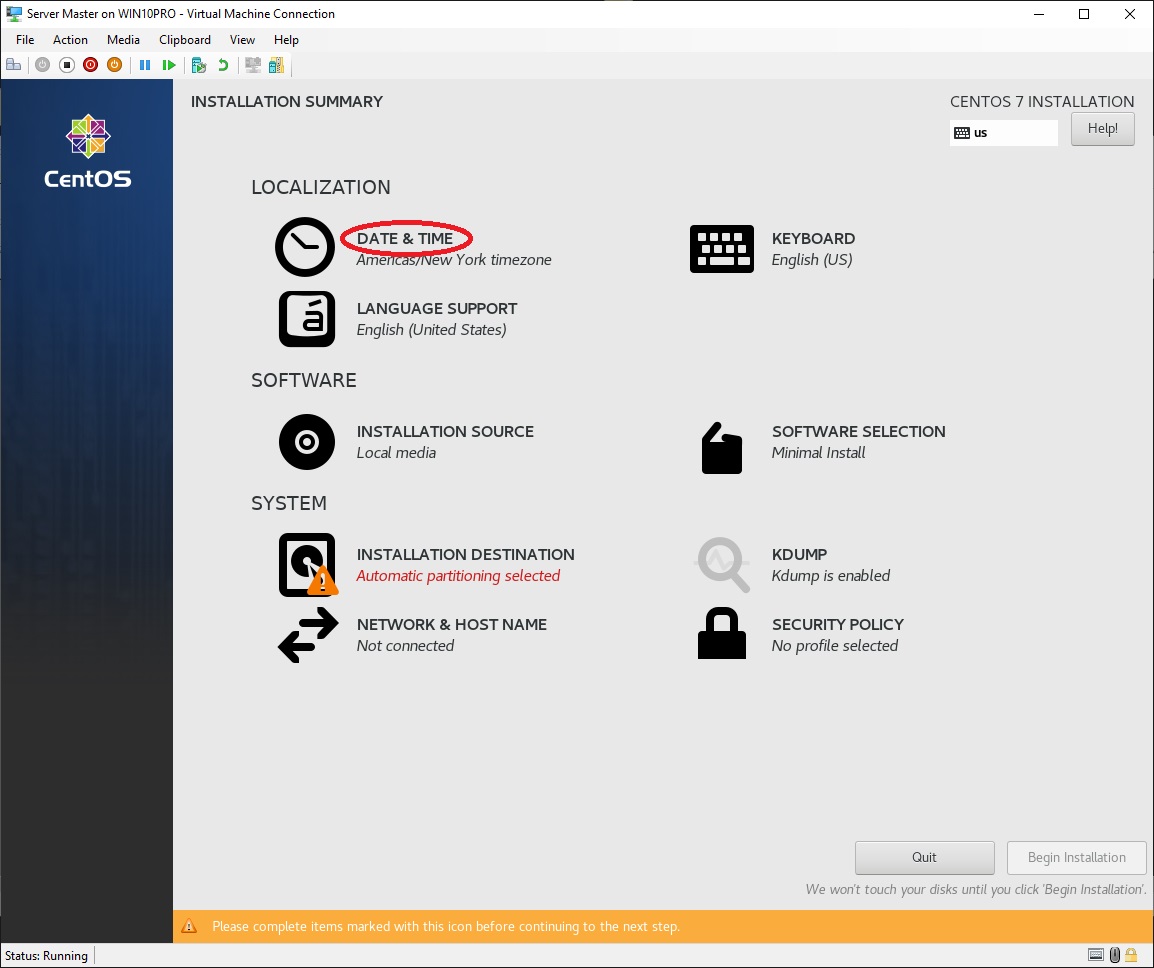
I wish to use danish time and date format, so I need to change the
settings for that, at "LOCALIZATION" click "DATE
& TIME"
•
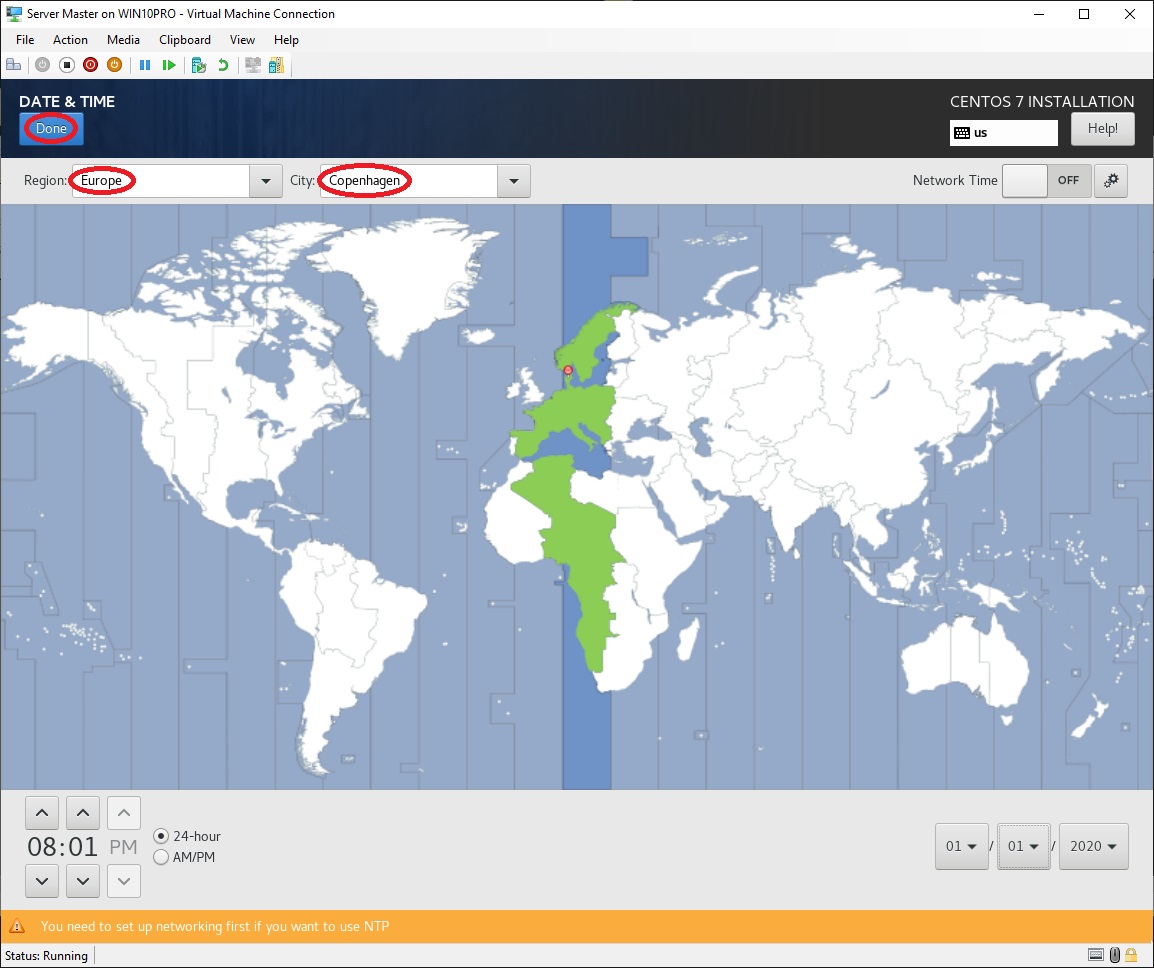
At "Region:" select your region, in my case "Europe"
• At "City:" select your city, in my case "Copenhagen"
• Click "Done"

•
I use a danish keyboard, so I need to add support for that, at
"LOCALIZATION" click "KEYBOARD"
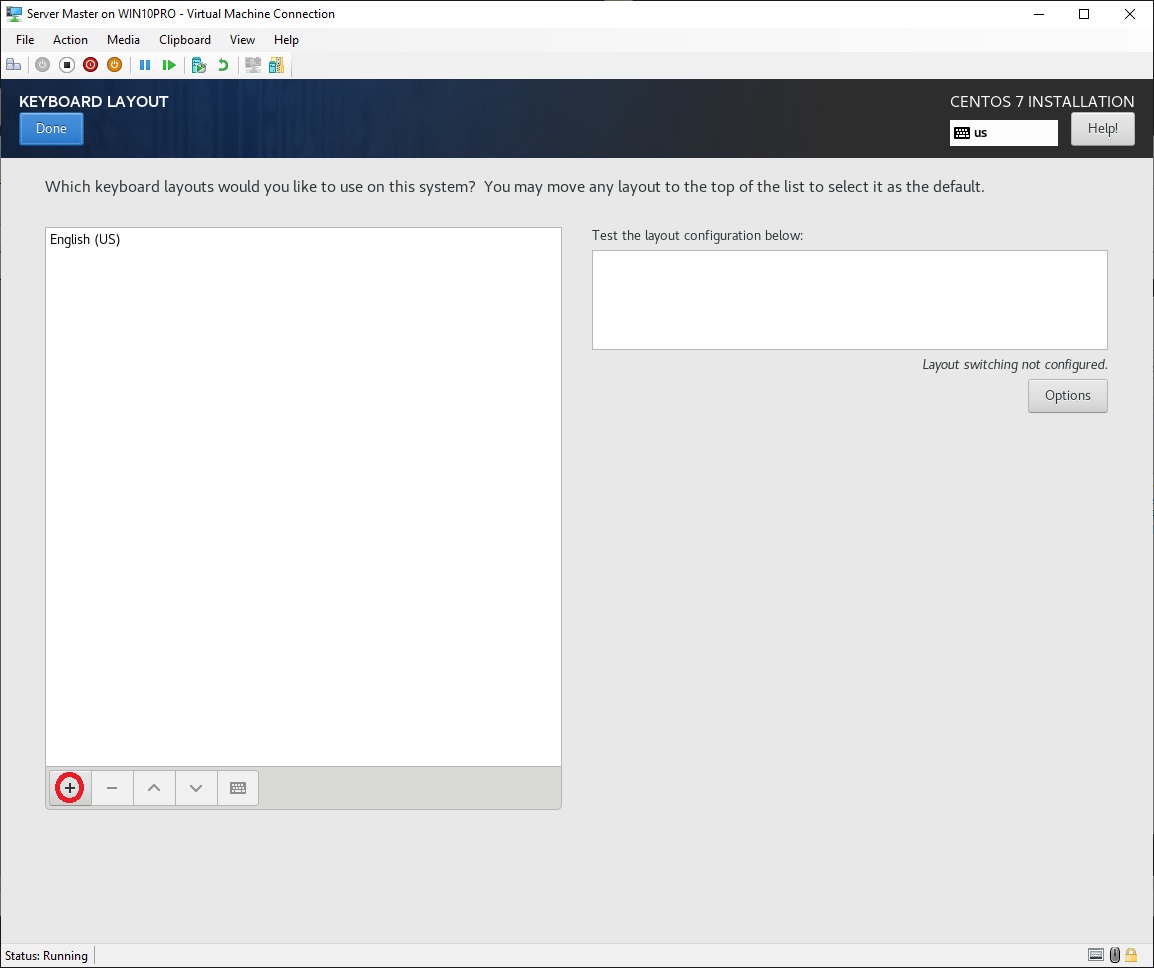
•
Click "+"
•
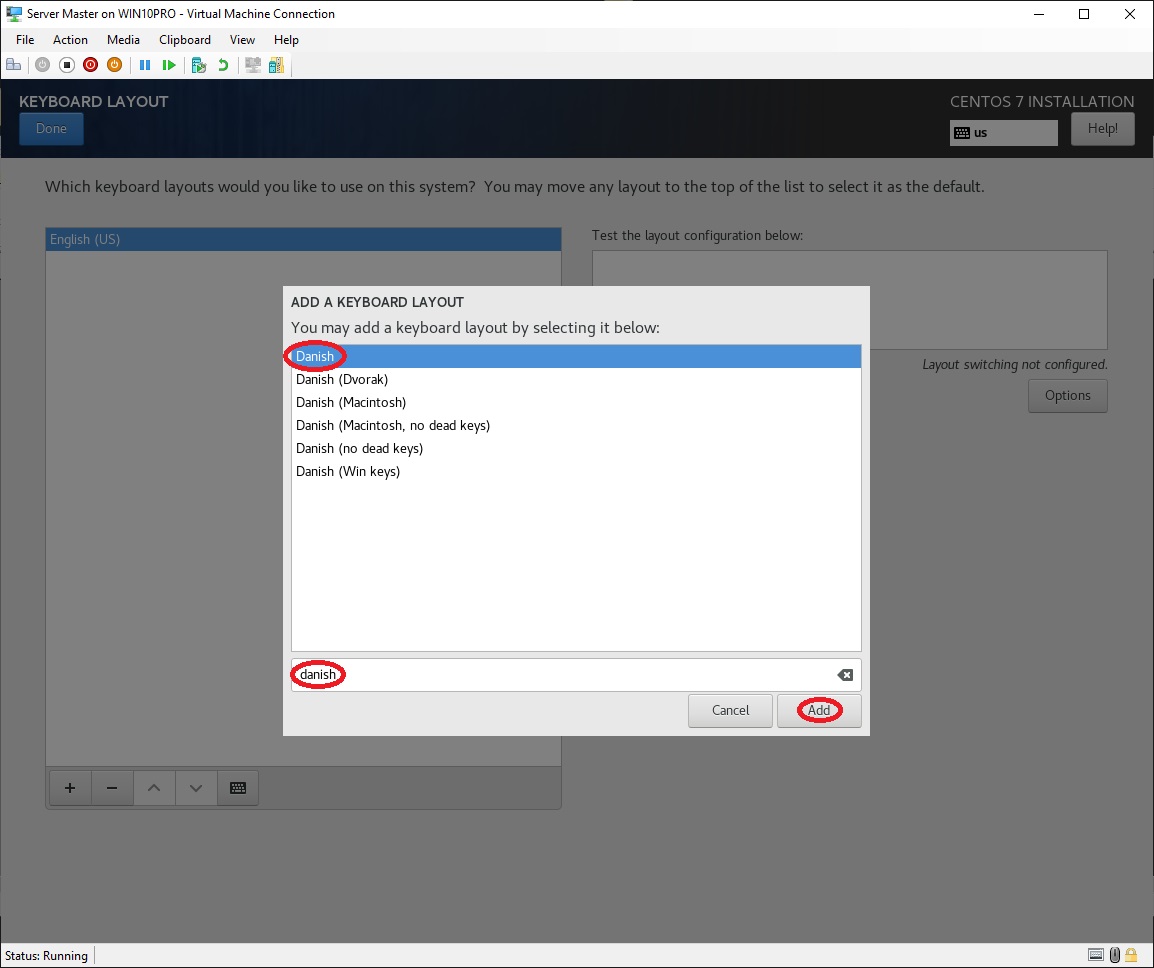
Write some or all of
the name of your language, in my case "danish"
• Choose your keyboard layout, in my case "Danish"
• Click "Add"

•
Select the newly added keyboard layout, in my case "Danish"
• Click "^" to move the it up and make it the default keyboard layout
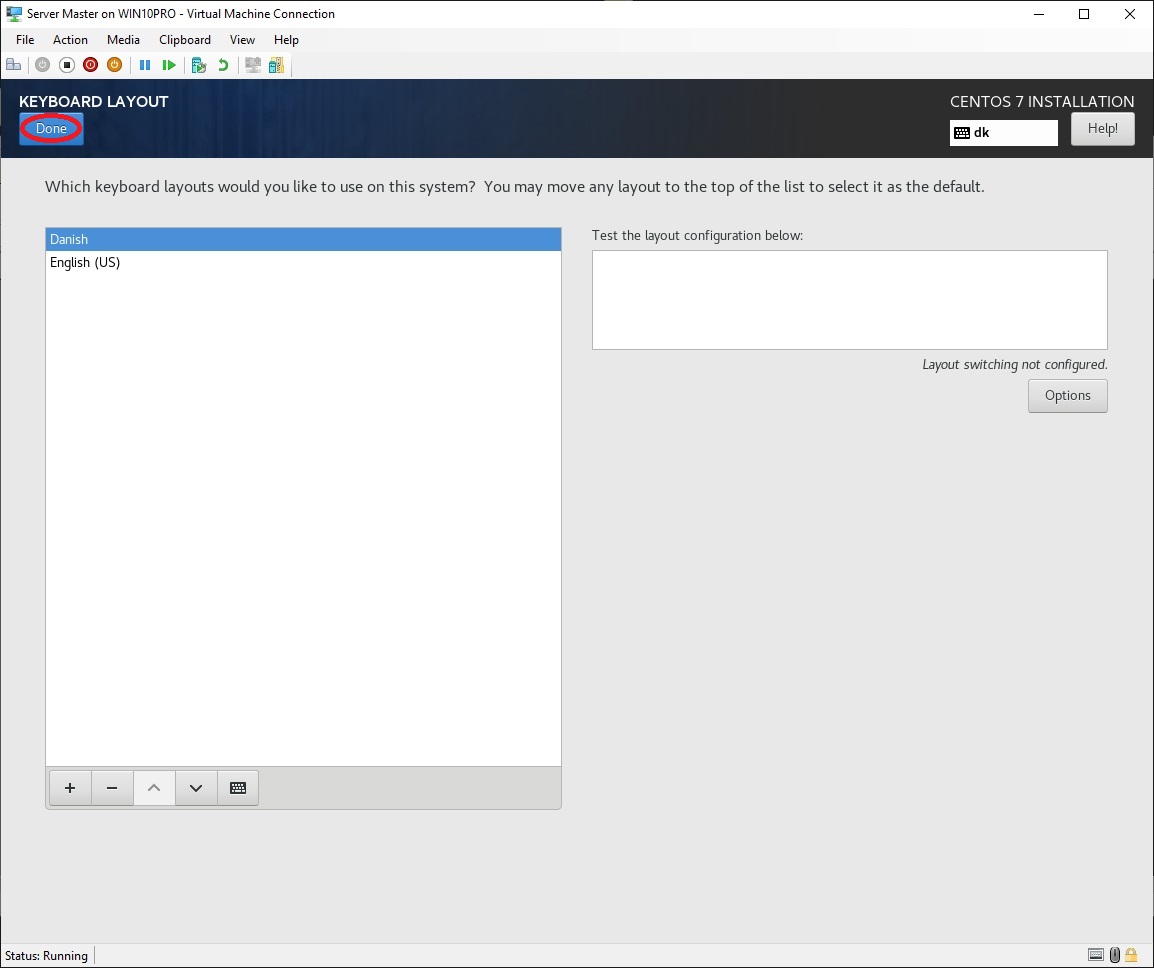
•
Click "Done"
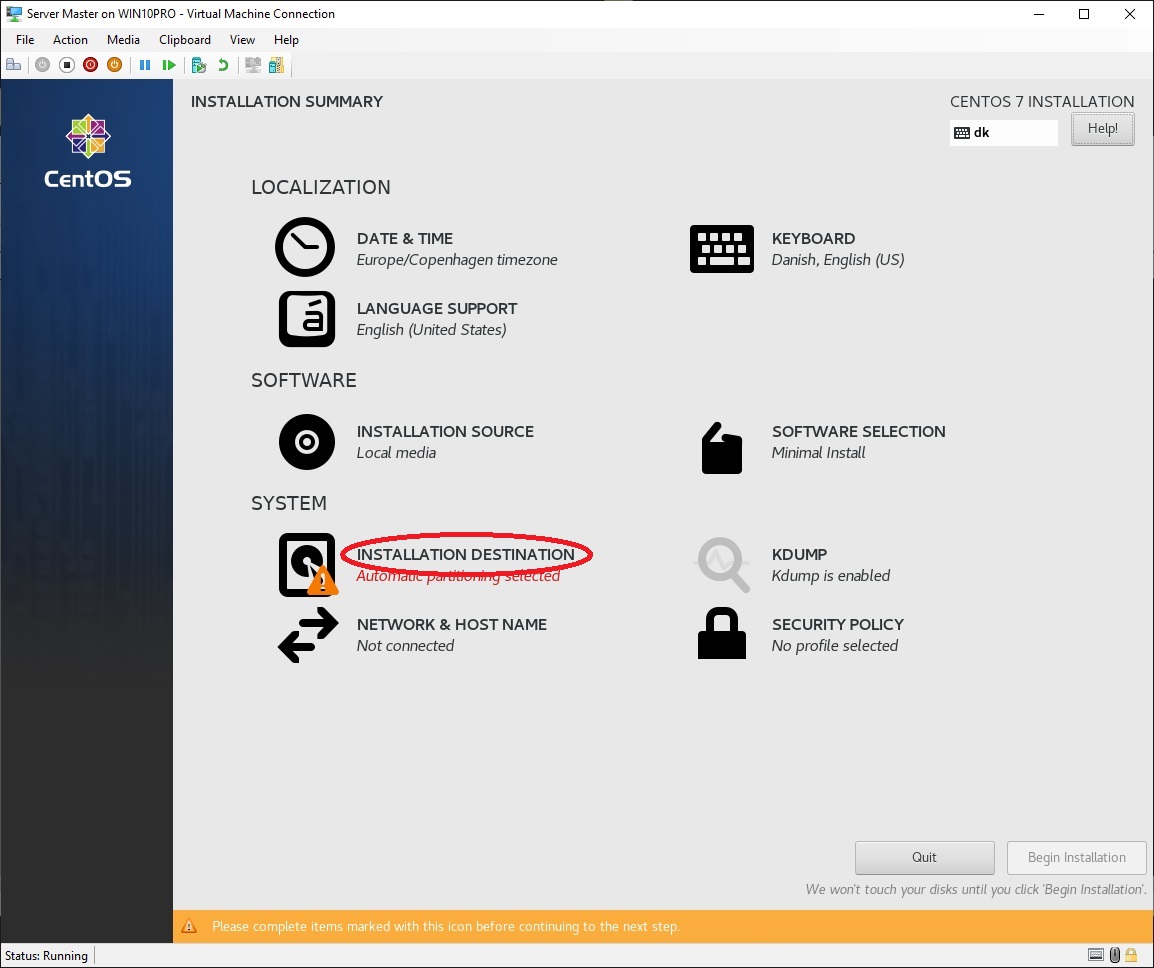
•
At "SYSTEM" click "INSTALLATION
DESTINATION"
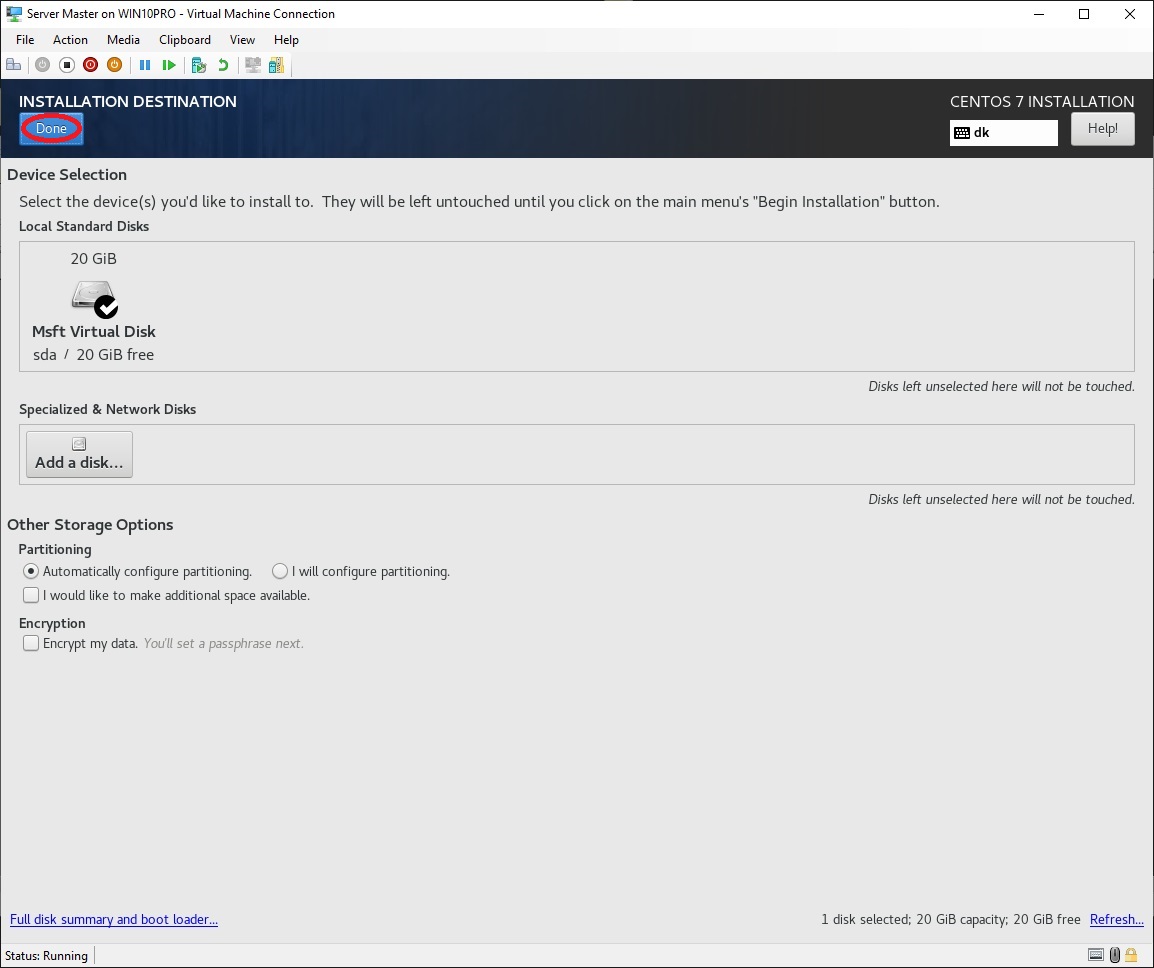
•
Click "Done"
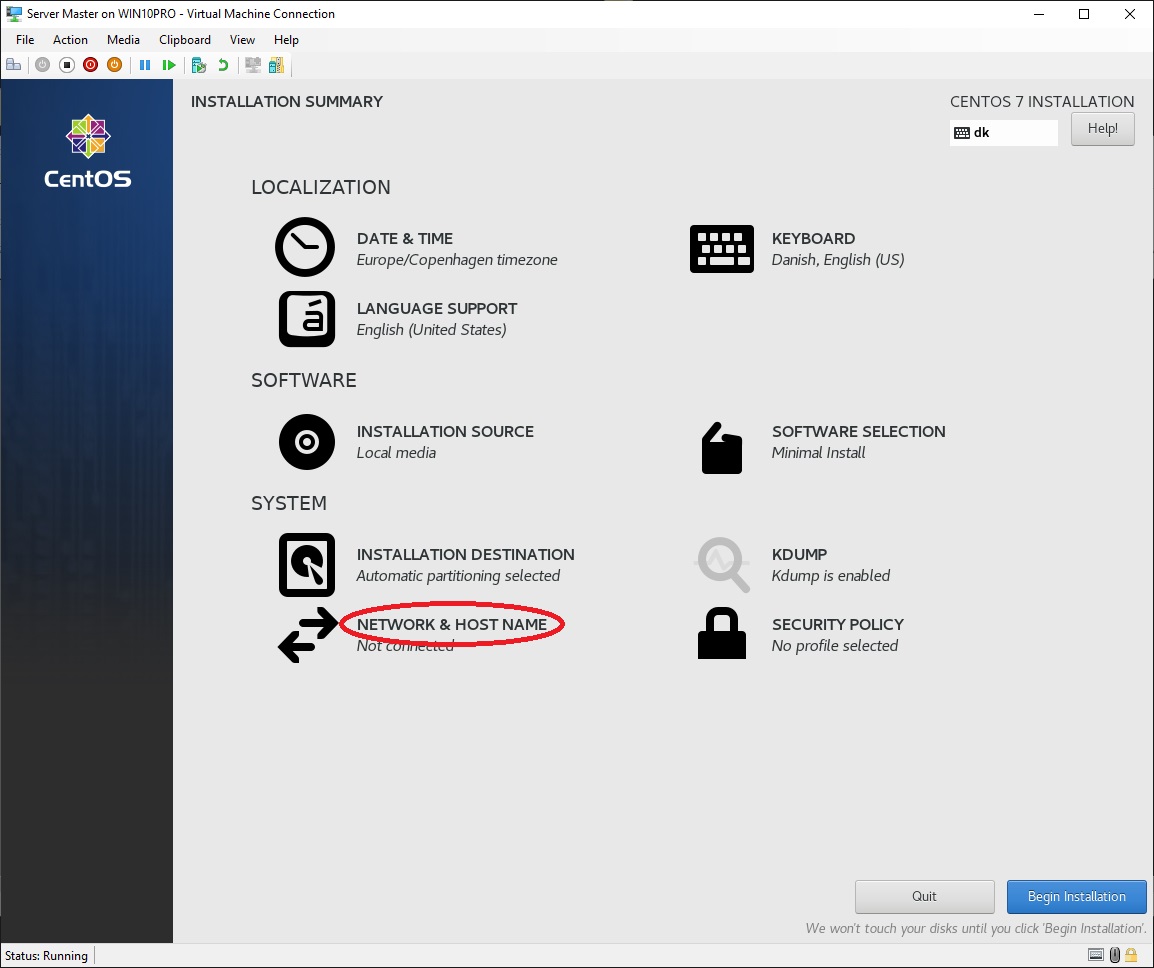
•
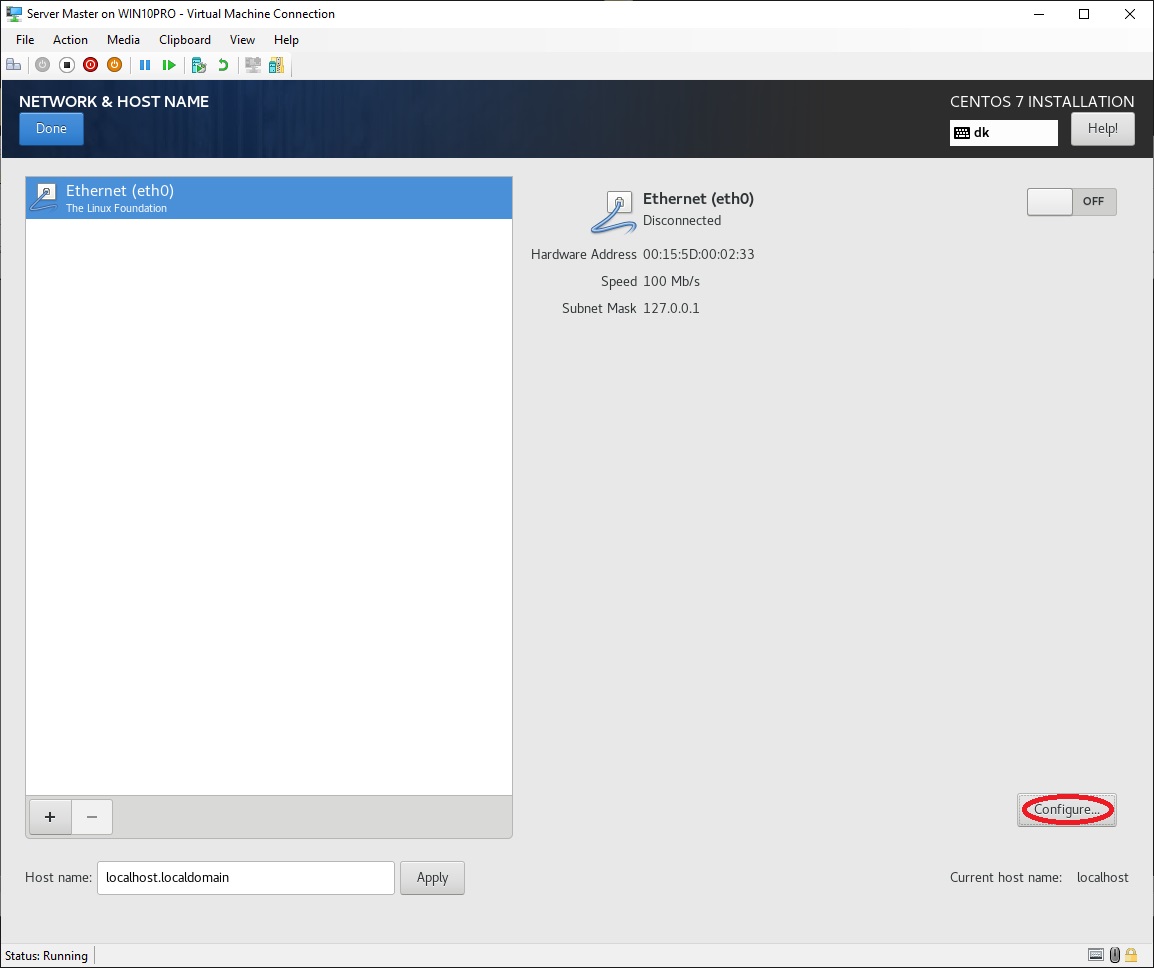
At "SYSTEM" click "NETWORK &
HOST NAME"
•
Select "Configure..."
•
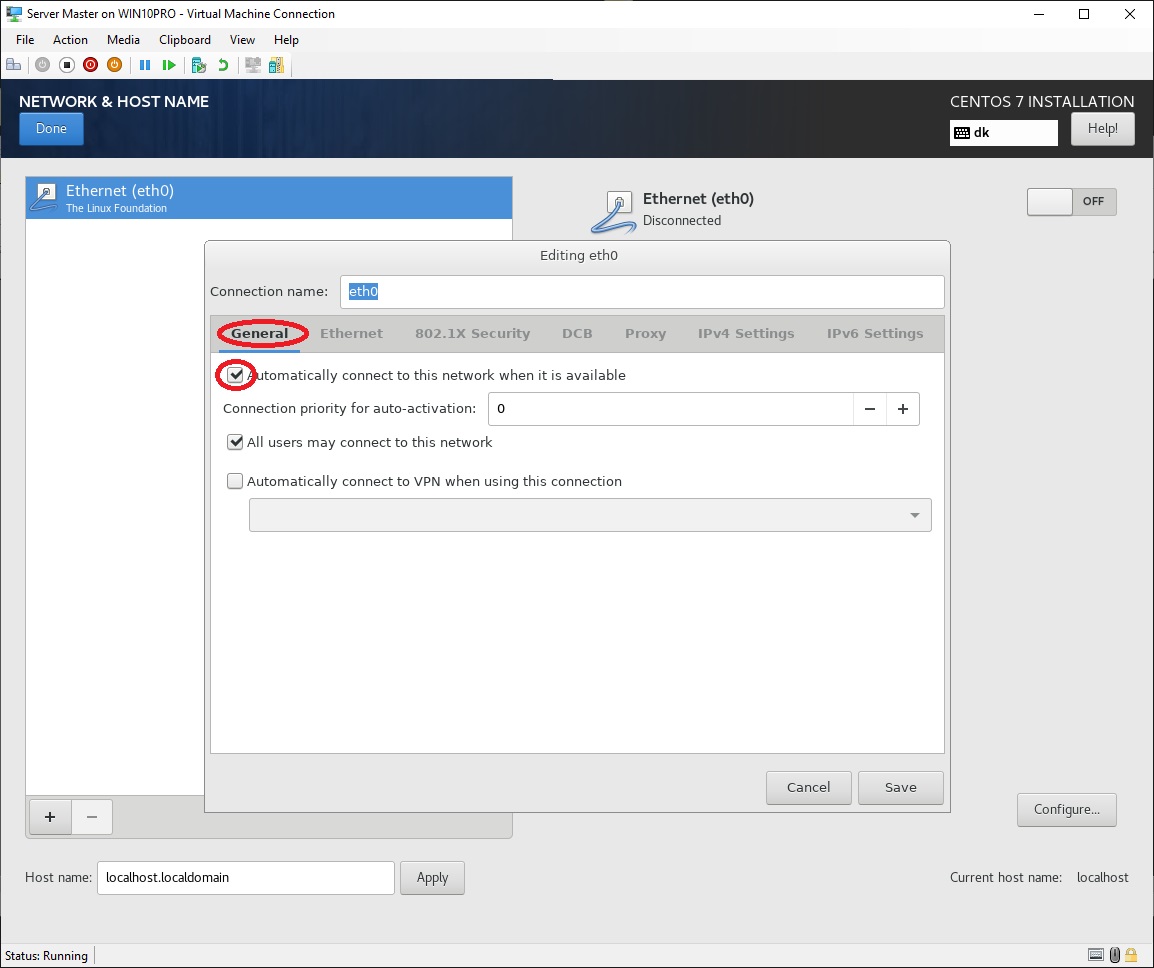
Select "General"
• Select "Automatically connect to this network when it is available"
•
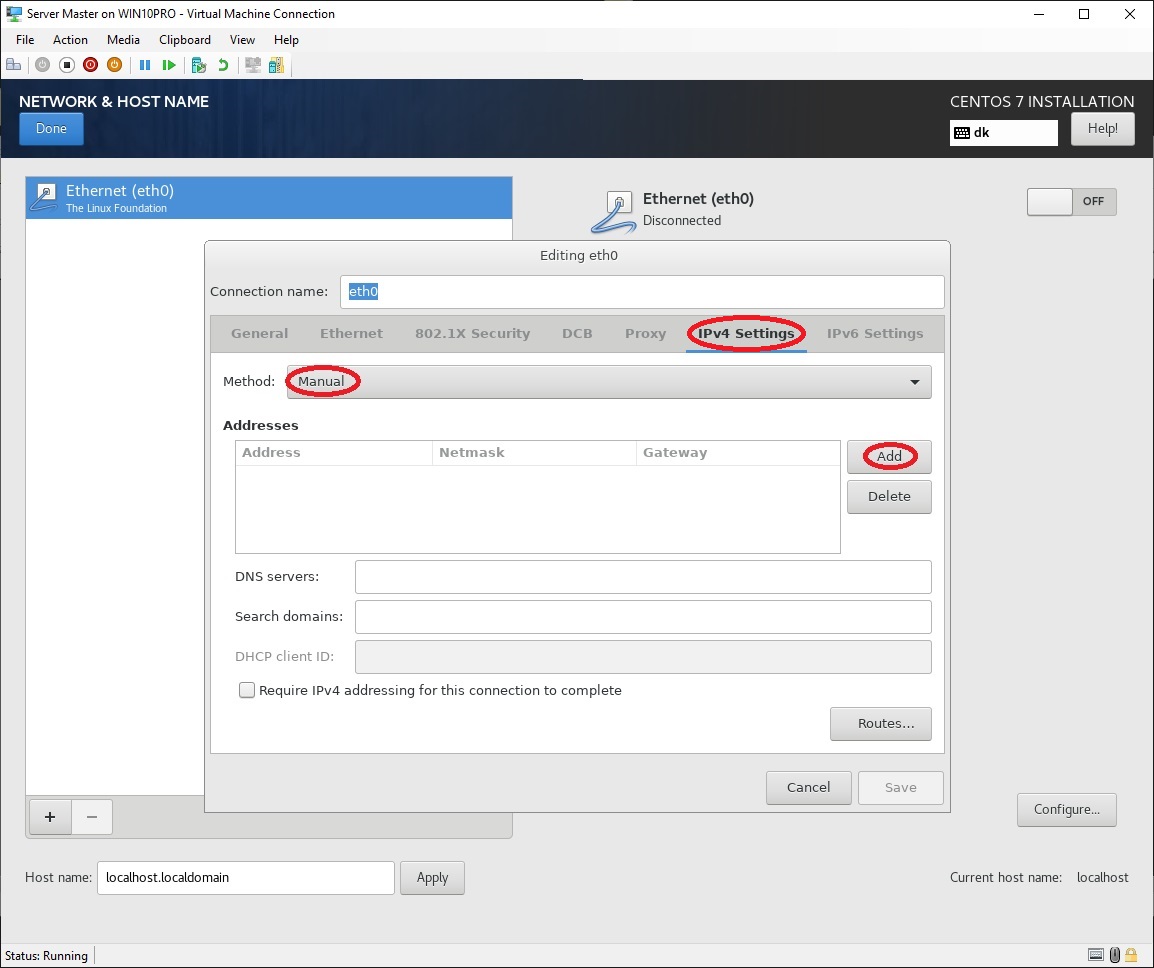
Select "IPv4
Settings"
• At "Method:" select "Manual"
• At "Addresses" click "Add"
•
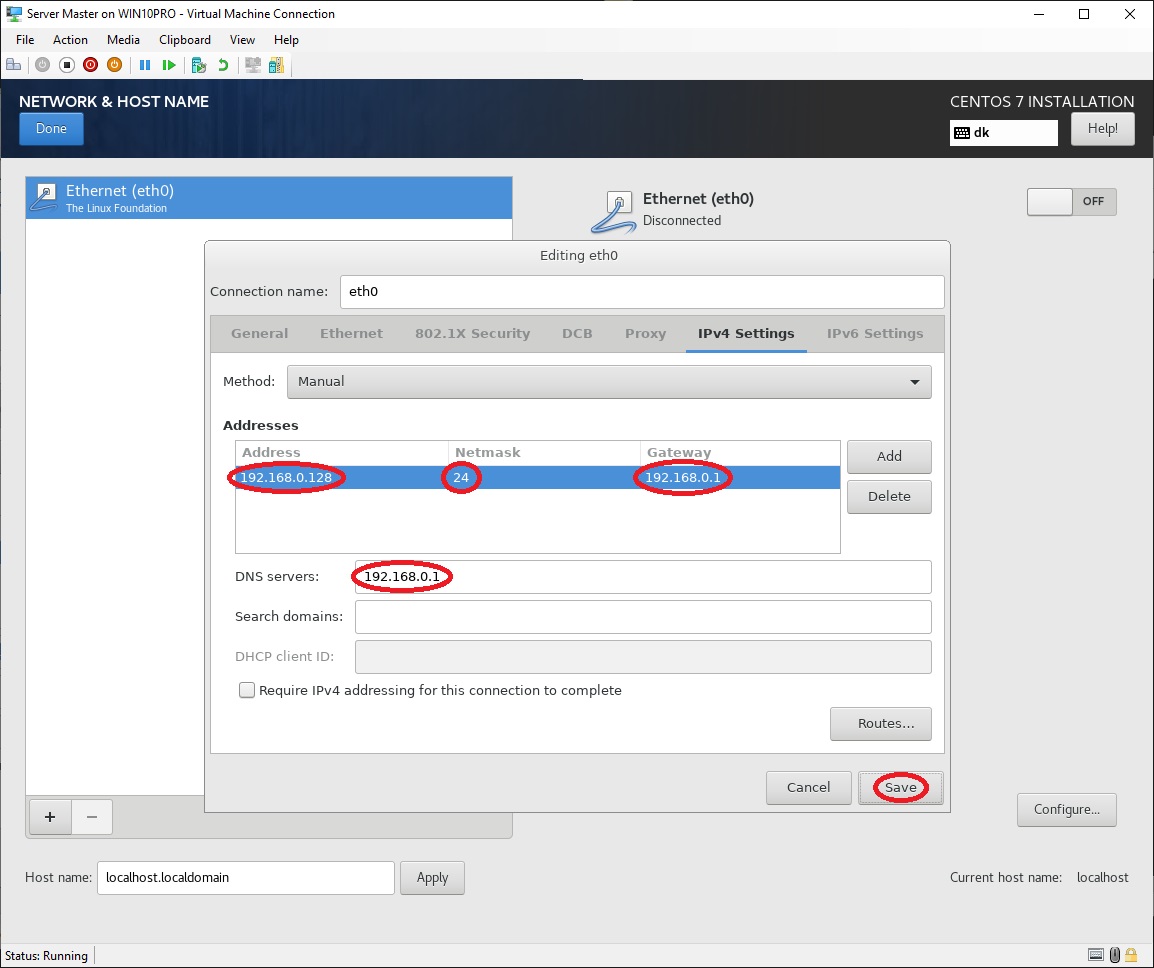
At "Address"
write "192.168.0.128"
• At "Netmask" write "24"
• At "Gateway" write "192.168.0.1"
• At "DNS servers:" write "192.168.0.1"
• Click "Save"
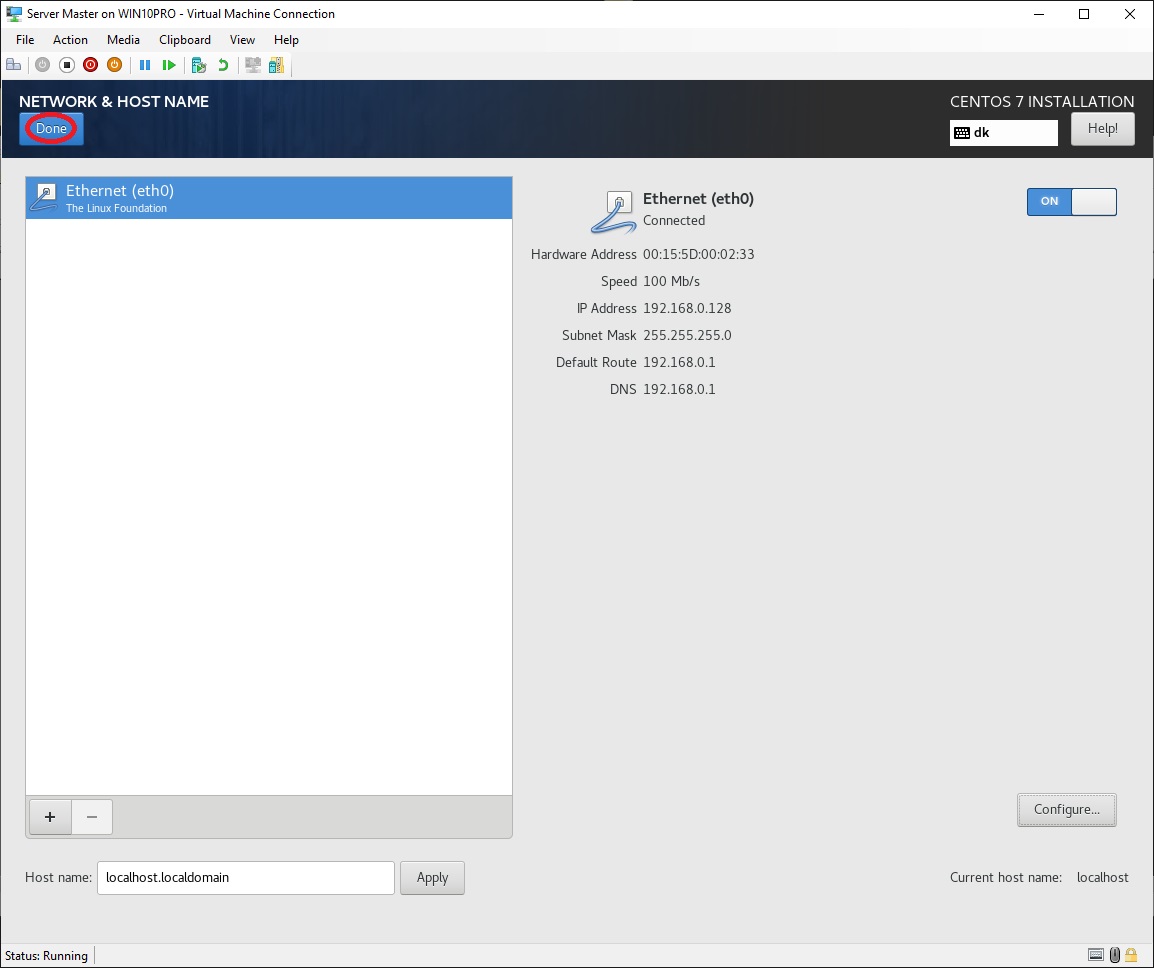
Click
"Done"
•
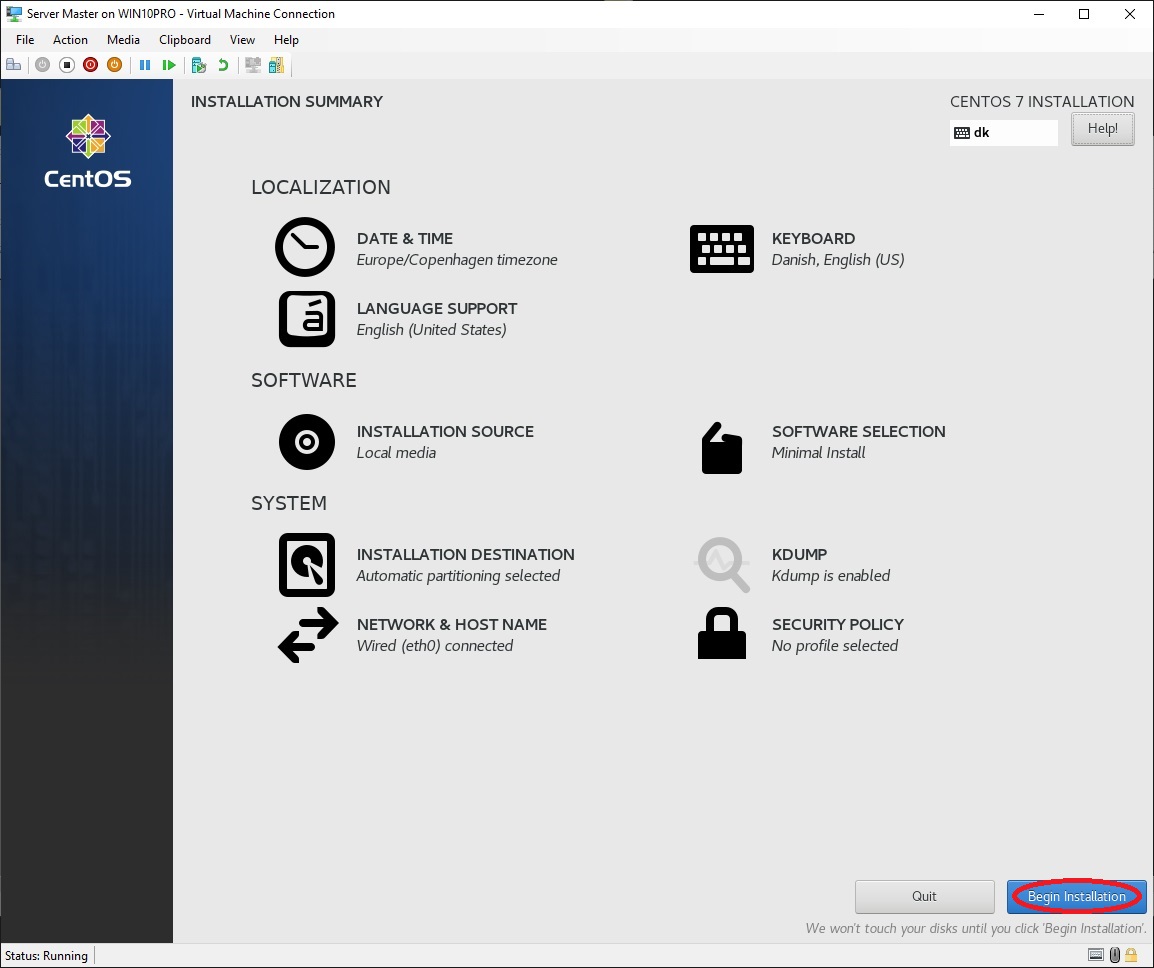
Click "Begin Installation"
•
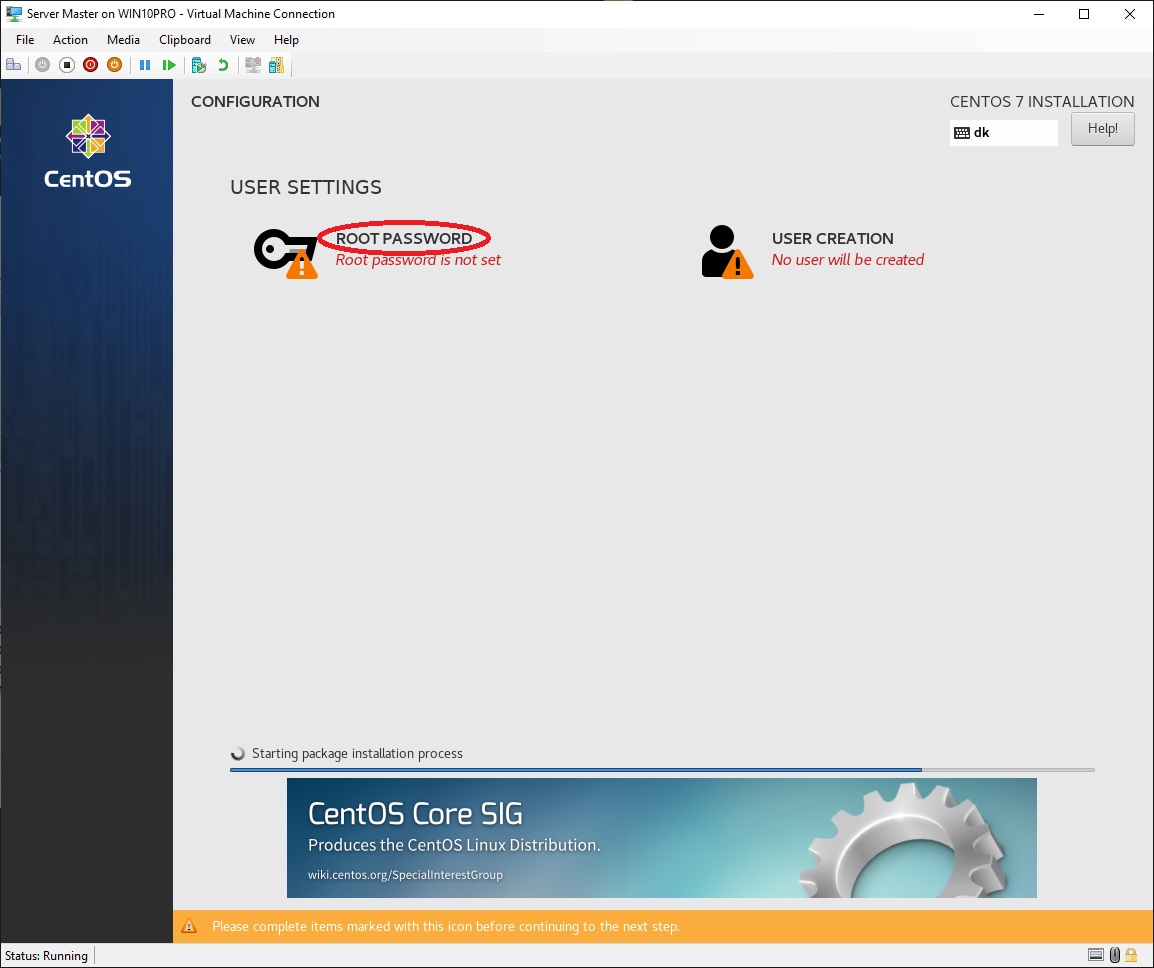
While the
installation process is running, at "USER
SETTINGS" click "ROOT PASSWORD"

•
At "Root Password:" write a strong password of your own
choice
• At "Confirm:" rewrite the password you just wrote above
• Click "Done"
•
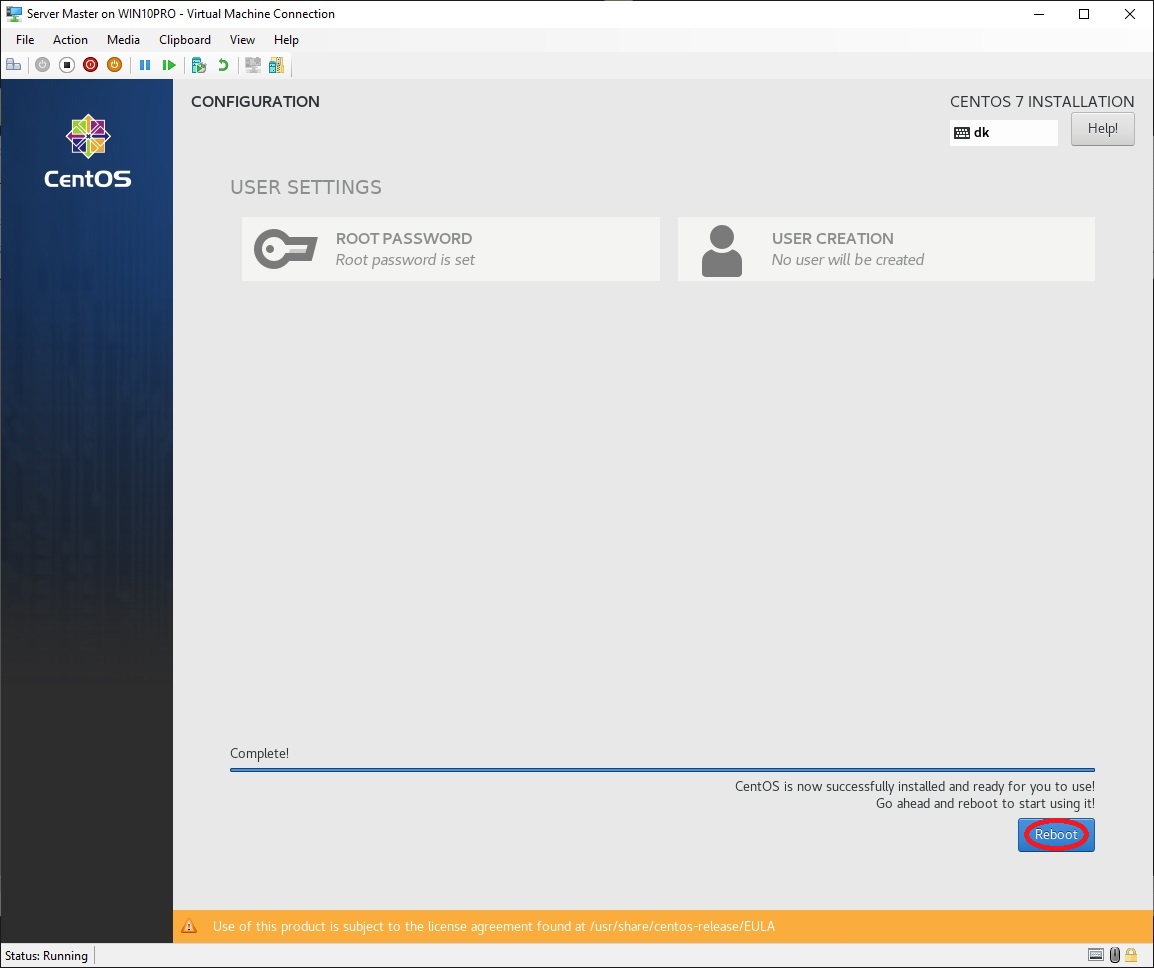
When the installation is complete, click "Reboot"
The installation is complete and the system is ready to load