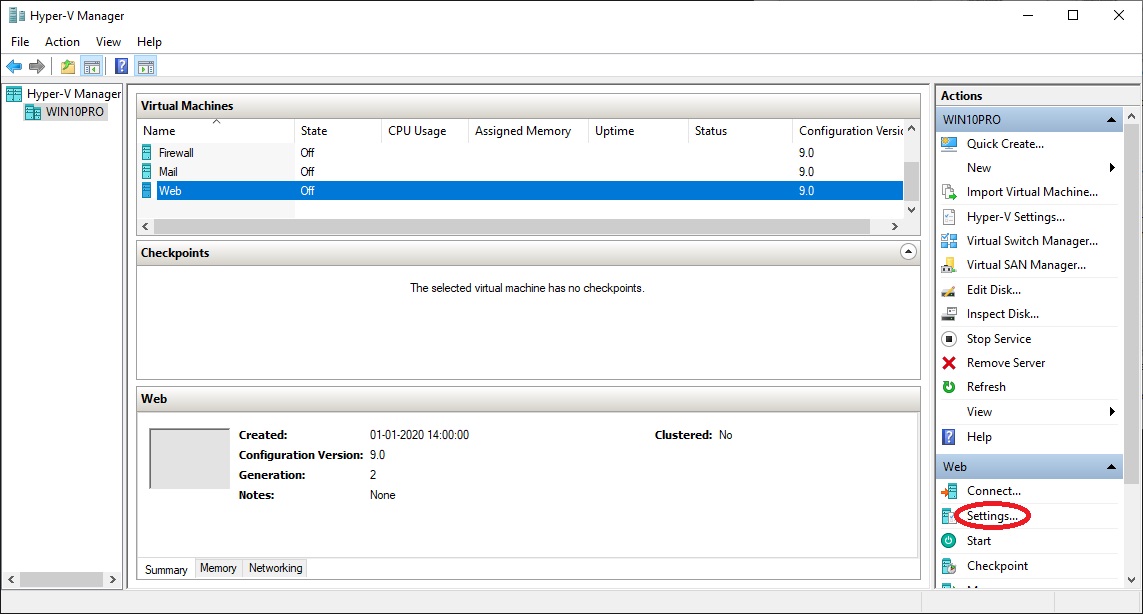
8.2 Startup Web Server virtual machine
8.4 Configure Firewall for Web service
• Startup the "DHCP" virtual machine (see 8.2 Startup Web Server virtual machine)
Now you could log in directly in the virtual machine as user root, but connecting through SSH from your host PC, makes it possible to copy and paste text into the console window
• Open "Command Prompt" on your host computer
Write what is highlighted in red
Instead of writing "teddy", then write the username you have created on the master virtual machine:
|
C:\Users\teddy>ssh teddy@192.168.0.128 teddy@192.168.0.128's password:write your user's password here |
|
[teddy@localhost ~]$ su Password:write the root password here |
Set the hostname of this machine, but use your own domain name instead of "yddet.dk":
|
[root@localhost teddy]# hostnamectl set-hostname web.yddet.dk |
Install the HTTP service:
|
[root@localhost teddy]# yum install httpd -y output output output ... Complete! |
Backup and edit the HTTP service configuration file:
|
[root@localhost teddy]# cd /etc/httpd/conf [root@localhost conf]# cp httpd.conf /backup [root@localhost conf]# vim httpd.conf |
Find this line and change it like this, but use your own domain name instead of "yddet.dk":
|
ServerAdmin root@yddet.dk |
Add the line highlighted in red, but use your own domain name instead of "yddet.dk":
|
#ServerName www.example.com:80 ServerName www.yddet.dk:80 |
Save the document and quit vim
Create and edit a default web page:
|
[root@localhost conf]# vim /var/www/html/index.html |
Write some html code like this:
|
<!DOCTYPE html> <html> <head> <title>Wen page root</title> </head> <body> <h1>This is the root of my web page</h1> <p>I hope you can see it</p>
</body> </html> |
Save the document and quit vim
Enable the HTTP service at system startup:
|
[root@localhost conf]# systemctl enable httpd Created symlink from /etc/systemd/system/multi-user.target.wants/httpd.service to /usr/lib/systemd/system/httpd.service. |
Install PHP web service extensions:
|
[root@localhost conf]# yum install php -y output output output ... Complete! |
Install support for extra packages:
|
[root@localhost conf]# yum install epel-release -y output output output ... Complete! |
Install webmail service extensions:
|
[root@localhost conf]# yum install squirrelmail -y output output output ... Complete! |
Edit the squirrelmail configuration:
|
[root@localhost conf]# /usr/share/squirrelmail/config/conf.pl |
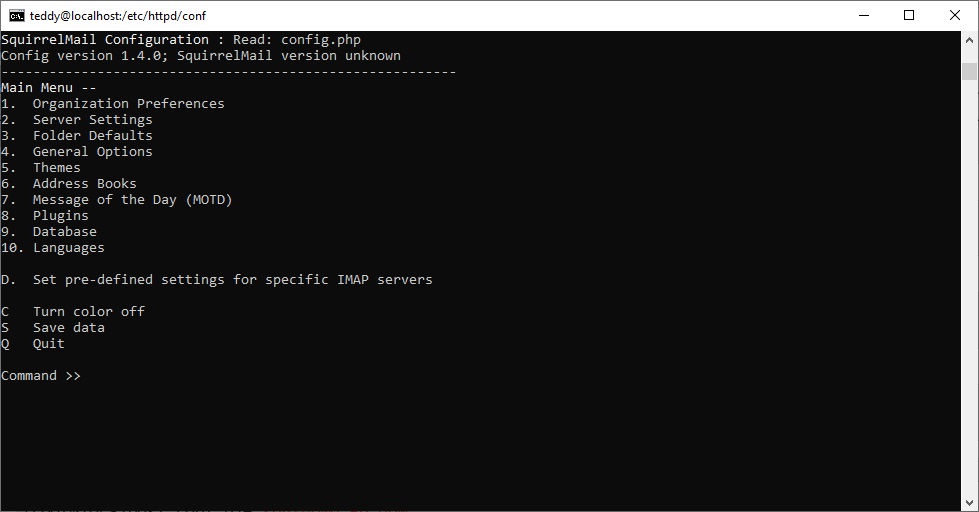
Write what is highlighted in red:
|
Command >> 1 |
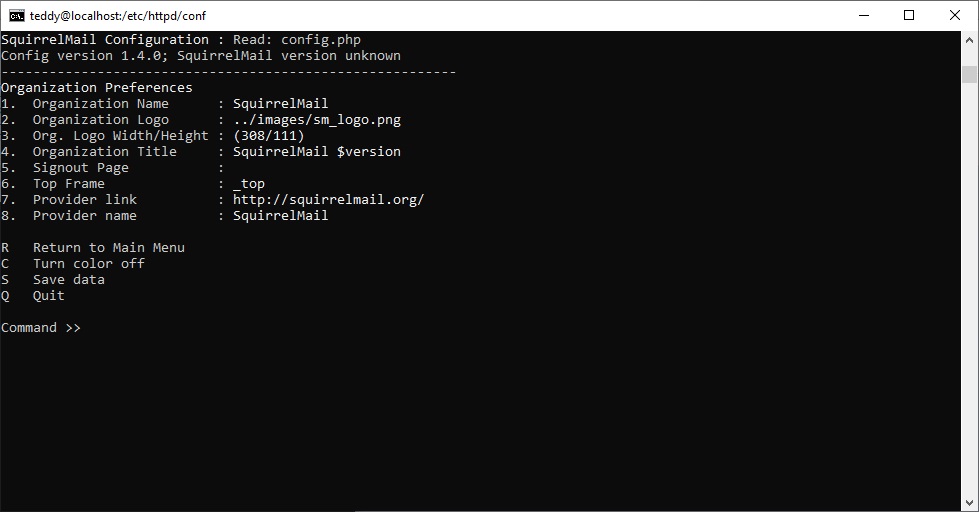
Write what is highlighted in red, but write your own organization name instead of "yddet.dk":
|
Command >> 1
We have tried to make the name SquirrelMail as transparent as possible. If you set up an organization name, most places where SquirrelMail would take credit will be credited to your organization.
If your Organization Name includes a '$', please precede it with a \. Other '$' will be considered the beginning of a variable that must be defined before the $org_name is printed. $version, for example, is included by default, and will print the string representing the current SquirrelMail version.
[SquirrelMail]: yddet.dk |
Write what is highlighted in red, but write your own organization title instead of "Teddy's webmail":
|
Command >> 4
A title is what is displayed at the top of the browser window in the titlebar. Usually this will end up looking something like: "Netscape: SquirrelMail $version"
If your Organization Title includes a '$', please precede it with a \. Other '$' will be considered the beginning of a variable that must be defined before the $org_title is printed. $version, for example, is included by default, and will print the string representing the current SquirrelMail version.
[SquirrelMail $version]: Teddy's webmail |
Write what is highlighted in red, but write your own organization title instead of "Teddy's webmail":
|
Command >> r |
Write what is highlighted in red:
|
Command >> 2 |
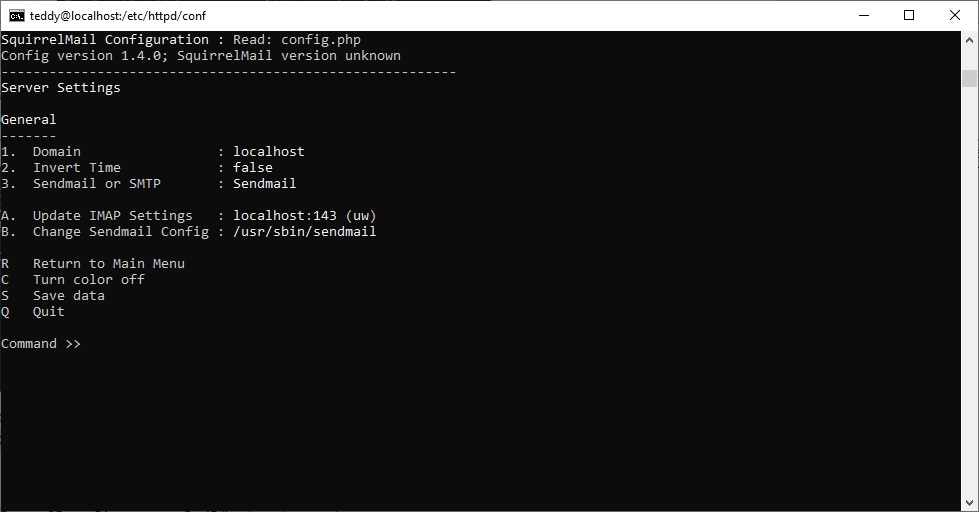
Write what is highlighted in red, but write your own domain name instead of "yddet.dk":
|
Command >> 1
The domain name is the suffix at the end of all email addresses. If for example, your email address is jdoe@example.com, then your domain would be example.com.
[localhost]: mail.yddet.dk |
Write what is highlighted in red:
|
Command >> 3
You now need to choose the method that you will use for sending messages in SquirrelMail. You can either connect to an SMTP server or use sendmail directly.
1. Sendmail 2. SMTP Your choice [1/2] [1]: 2 |
Write what is highlighted in red:
|
Command >> a |
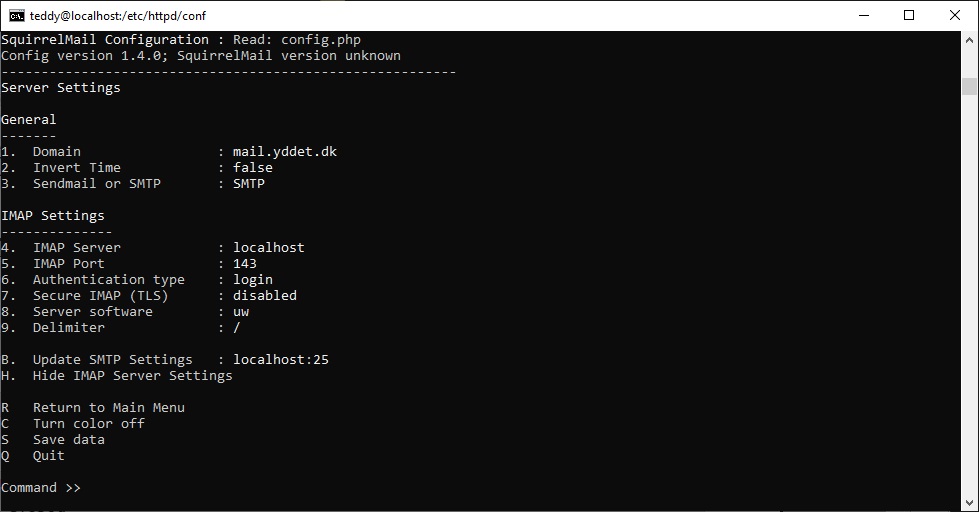
Write what is highlighted in red, but write your own domain name instead of "yddet.dk":
|
Command >> 4
This is the hostname where your IMAP server can be contacted. [localhost]: mail.yddet.dk |
Write what is highlighted in red:
|
Command >> b |
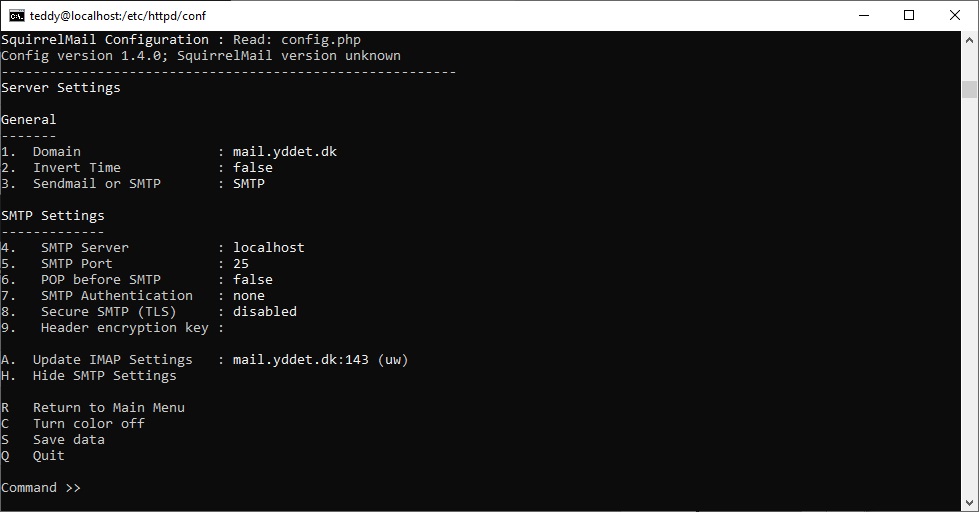
Write what is highlighted in red, but write your own domain name instead of "yddet.dk":
|
Command >> 4
This is the hostname of your SMTP server. [localhost]: mail.yddet.dk |
Write what is highlighted in red:
|
Command >> s
Data saved in config.php Press enter to continue... Command >> q You might want to test your configuration by browsing to http://your-squirrelmail-location/src/configtest.php Happy SquirrelMailing! |
Create and edit the virtual host configuration file:
|
[root@localhost conf]# vim /etc/httpd/conf.d/vhost.conf |
To add support for the webmail service, add these lines to the document:
|
Alias /webmail /usr/share/squirrelmail <Directory /usr/share/squirrelmail> Options Indexes FollowSymLinks RewriteEngine On AllowOverride All DirectoryIndex index.php Order allow,deny Allow from all </Directory> |
Save the document and quit vim
Edit the configuration file for the first Ethernet adapter:
|
[root@localhost conf]# EditNet |
Find these lines and change them to:
|
IPADDR=192.168.255.5 GATEWAY=192.168.255.1 DNS1=192.168.255.2 |
Add this line to the end of the document, but use your own domain name instead of "yddet.dk":
|
DOMAIN=yddet.dk |
Save the document and quit vim
Shutdown the system, and exit "Command Prompt":
|
[root@localhost conf]# shutdown -h now Connection to 192.168.0.128 closed by remote host. Connection to 192.168.0.128 closed.
C:\Users\teddy>exit |
• Return to the "Web" virtual machine
•
Click "X"
to close the virtual machine
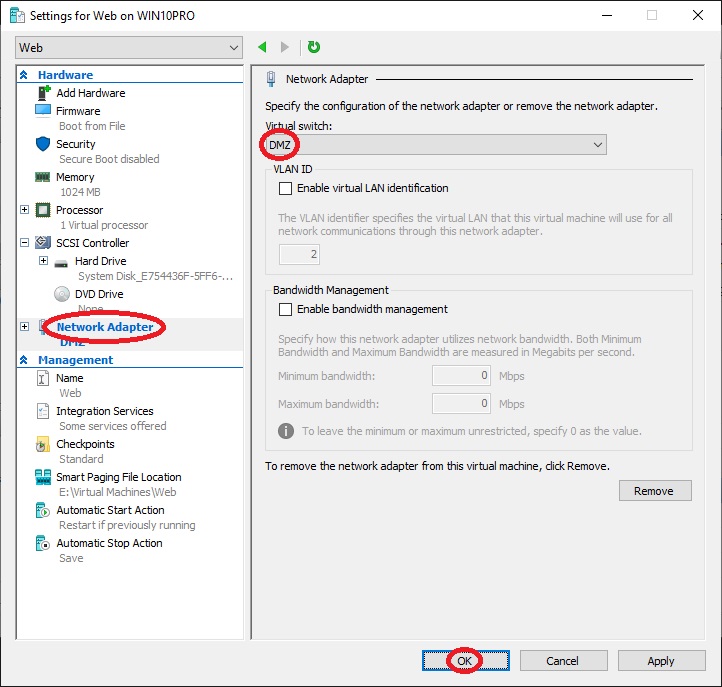
• Return to "Hyper-V Manager"
•
At "Actions" click
"Settings..."
•
At
"Hardware" select "Network
Adapter"
• At "Virtual switch:" select "DMZ"
• Click "OK"