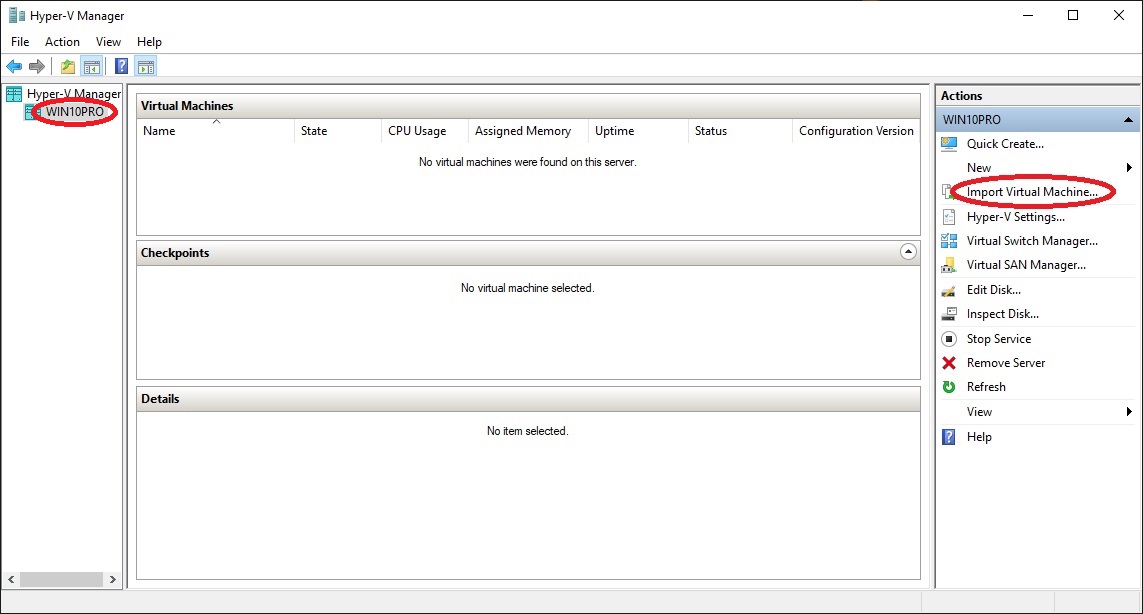
• Select your computer name, in my case ”WIN10PRO”
2.5 Export Server Master virtual machine
3.2 Startup Client Master virtual machine
• Open ”Hyper-V Manager” from the start-menu
•
Select your computer name, in my case ”WIN10PRO”
• At "Actions" click "Import Virtual Machine..."
•
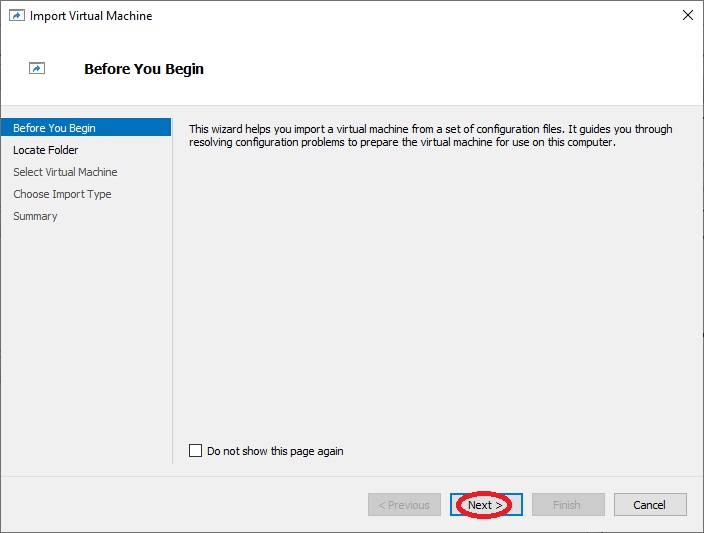
Click "Next >"
•
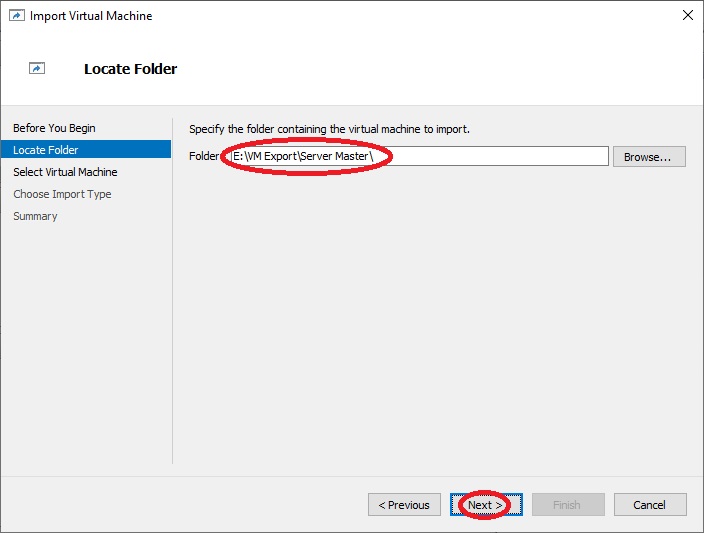
At "Folder:" write the path to the folder that contains the
"CentOS 8 Core Master" exported virtual machine, in my case
"E:\VM Exports\Server Master\"
or you can click on "Browse..."
to navigate to the folder
• Click "Next >"
•
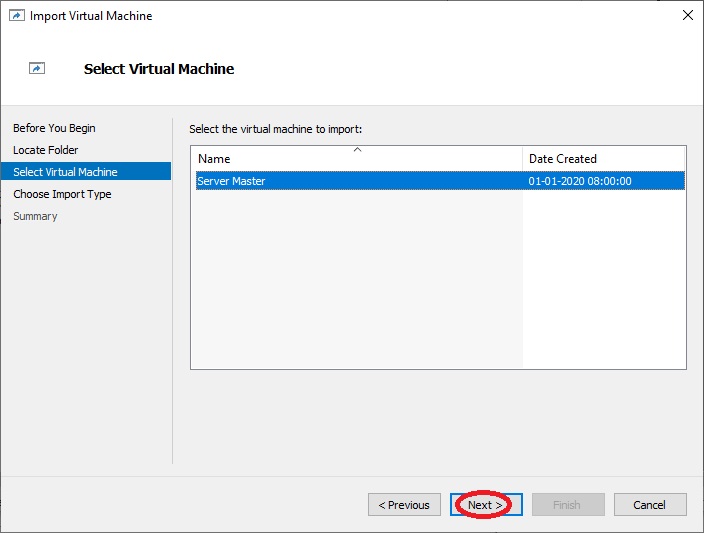
Click "Next >"

•
At "Choose the type of import to perform" select "Copy
the virtual machine (create a new unique ID)"
• Click "Next >"

•
Select "Store the virtual machine in a
different location"
• At "Virtual machine configuration folder:" write the path where you want to store the virtual machine, in my case "E:\Virtual Machines\Client Master" or you can click on "Browse..." to navigate to and create the folder
• At "Checkpoint store:" write the same path as before, but add "\Snapshots" to the end, like "E:\Virtual Machines\Client Master\Snapshots" or you can click on "Browse..." to navigate to and create the folder
• At "Smart Paging folder:" write the same path as the first path, like "E:\Virtual Machines\Client Master" or you can click on "Browse..." to navigate to the folder
• Click "Next >"
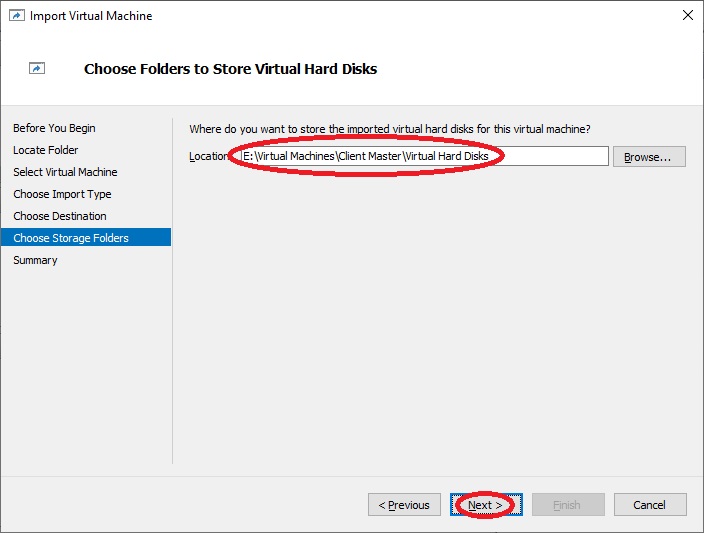
•
At "Location:" write the path to the new virtual machine,
but add "\Virtual Hard Disks" to the end, like "E:\Virtual
Machines\Client Master\Virtual Hard Disks" or you can
click on "Browse..." to
navigate to and create the folder
• Click "Next >"
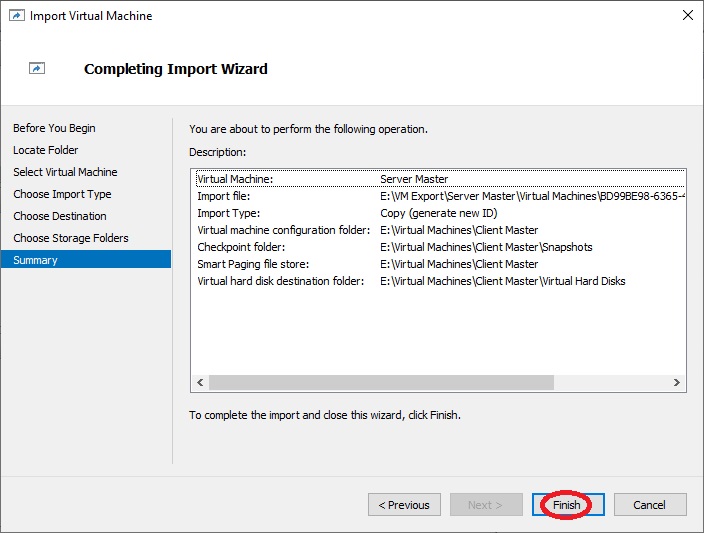
•
Click "Finish"
• Return to "Hyper-V Manager"
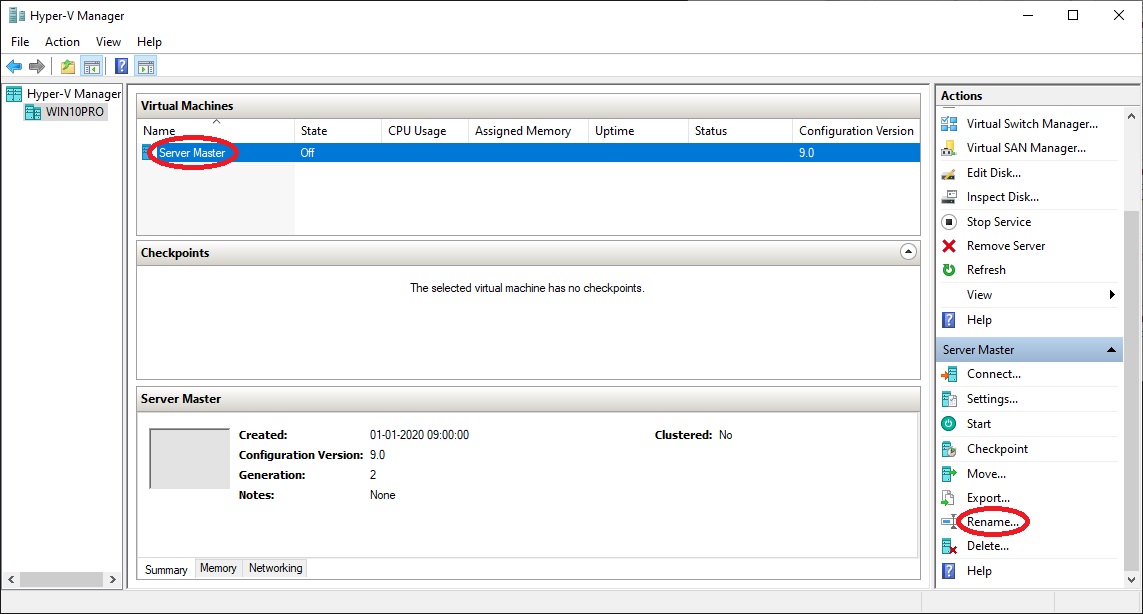
•
At "Virtual Machines" select the newly created virtual
machine "Server Master"
• At "Actions" click "Rename..."
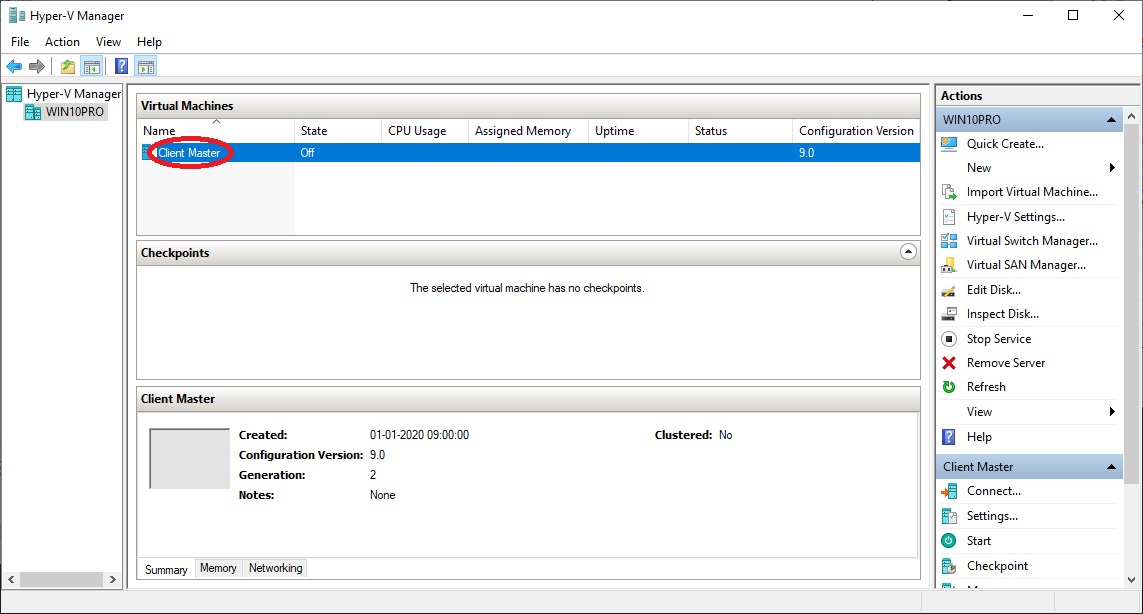
•
Write "Client Master"
• Press "Enter"